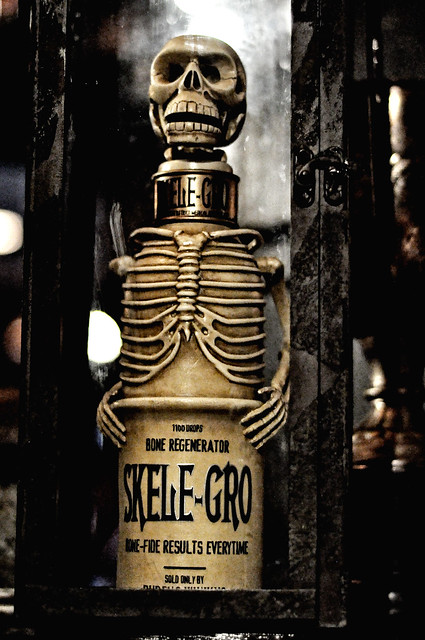
Skele-Gro
This modelling clay replica of the Skele-Gro, is the perfect afternoon Harry Potter craft. Hope you love it!
Materials Needed:
-1-2 blocks of white modelling clay
-Black modelling clay
-Orange modelling clay
-Yellow modeling clay
-X-Acto knife
-Plastic knife
1. Using an X-Acto knife, trace a thin line around the perimeter of one of the white modelling clay blocks. I made my line at about the 1/3 mark. Using a plastic knife, cut through the block, following your line. Set aside the larger portion.
2. Roll your recently cut piece of clay, so that it resembles a cylinder. Make each end level so that it stands up. Set aside.
3. Using the same technique as before, make a thin line, just under the 1/2 point mark, around the larger portion of the clay that you cut on step 1. Using the smaller piece hat you just cut, roll it out just like your other cylinder of clay, and stack them one on top of the other. It may take a while to get the bottom of both cylinders to match.
4. Roll out a "rope" like thing out of white clay so that it will go around the circumference of your cylinders. Place it on your two cylinders to cover the crack that marks where both of them meet together. Rub your thumb along the bottom of the "rope"so that it blends well with the clay underneath it. Do the same with the top of the "rope".

5. With an X-acto knife, draw out thin lines creating the ribs and spine. Use the pictures below to help you.
6. Roll out a bunch of thin "ropes" out of white clay. Cut them to the right length, and press them on to your drawn ribs.
 |
| front |
 |
| back |
7. Now it is time to make the little bit that attaches both sides of the ribs together. Make a figure that looks like a stretched out heart ( look at the pictures below ). Roll out lots of very thin "ropes", and place them on the top two bumps, and all along the "body of the figure. Stick/Press your figure in between the ribs on the front.
8. Make a bunch of little white spine bones like the ones bellow. Squish them all together to form the spine on the back. Once you have made the spine long enough to cover your drawn out spine, stick/press it on the back in between the ribs.
9. To make the shoulder blades, start with making two thin shapes that sort of look like elephant ears. Make sure they fit proportionally on the back on either side of the spine. Then, make two tear drop shapes. Placing the thinner side of the tear drop shaped bits on the inner part of the shoulder blades, press them on. Then, stick/press your shoulders blades onto the back, one on the left side of the spine, one on the right.
10. Now it is time to make the arms. Roll out two, two inch cylinders of white clay. Now, roll out eight balls of white clay, make four of them smaller than the other four. Attach one big ball, and one small ball onto each end of the two cylinders. Using the same technique as step 4, rub the cracks in the clay to make it smooth, and blend in with the rest of the clay. These will make the top parts of the arms.
11. Roll out four cylinders, about half the size of the ones used in the top parts of the arms. Attach two together by squishing together the ends, these will soon become the bottom half of the arms. Do the same with the other two. Roll out two balls to go on one end of the bottom halves of the arms. rub the cracks to blend it in. Now, roll out ten super skinny "ropes" to make the fingers. Arrange, and press on five of the fingers onto the other end of each of the bottom halves of the arms.
12. Place and press on the top halves of the arms on each side of the body, so that they are diagonal, and that one end is higher than the other ( the higher end is closer to the front of the body). Now, press on the bottom halves so that they are reaching forwards (see pictures below). It kinda remind =s me of a "chicken wing" position.
13. Make a cylindrical block to form the neck of the bottle. Place it on the top of the figure, and rub the ends to blend it in with the clay underneath, and to make it look like one continuous piece of clay. Press down a thinner hamburger like form on top of the previously put on neck. Roll out two thin "ropes, and press them around the top and bottom of the neck. Set aside.
14. Roll out two balls, one a bit smaller than the other. These will eventually form the skull.
15. Stick the two balls together by rubbing the cracks/part of the clay that does not connect fully, so that they look like one continuous piece of clay. Using the end that is not sharp of your X-Acto knife, make two sockets for the eyes. With some black clay, make a dot in the socket.
16. Cut off a bit of the tip of the nose/mouth section, just to give it more of a skull look. Roll out a short rope of black clay for the centre of the mouth. Press into place. Them, roll one long, and very thin rope, and cut to the desired length to make the lines of the teeth, and the outer rim (see picture below).
17. Form a wedge out of white clay, to prop up the skull. Place and press it under the back side of the skull, and then press it onto the neck of the bottle. You can rub the crevices to make it look smoother.
18. Mix together a mixture of black, white, orange, and yellow, to make a colour similar to the one below. Cover the neck with a thin "blanket" of this colour.
19. Roll out a bunch of pieces of black clay. Spell out the words Skele-Gro, so that they will fit on the bottom piece. Press the letters on and voila!
tell us how you like our new look!